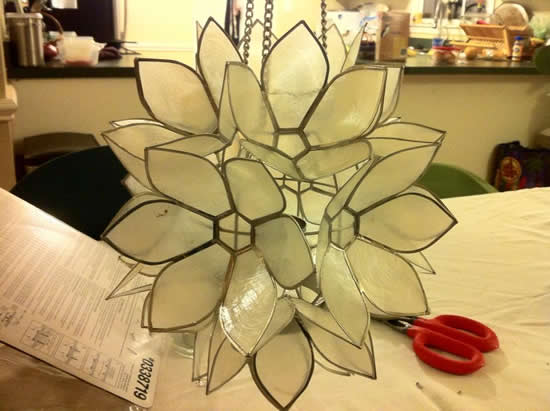
While shopping at Home Goods for some side tables, we came across what we thought was a cute little floral glass light shade. Unfortunately it was just a candle holder, but I figured with a little ingenuity I’d be able to modernize it and make an electric fixture out of it. We decided we would use it in the laundry room since it was a small room and only a single light bulb would fit into the shade.
Light shade before I started cutting it apart.
It took me a few weeks to brainstorm and figure out how I would retrofit the shade, but I finally decided I would use a simple mini pendant light like you would find hanging over a kitchen bar or island, shorten the wire, and somehow attach it to the shade. I headed to Lowe’s with a Christmas gift card (thanks in-laws) and found exactly what I was looking for in a Portfolio Matte White Mini Pendant Light Fixture. I also got a Portfolio 10” Ceiling Medallion to add a little class to the install.

Mini pendant fixture.
I still wasn’t sure exactly how I was going to marry the pendant light fixture to the shade, but I did know it would involve some sheet metal and tin snips. Since I had neither Nikki and I headed to Home Depot, hoping that inspiration would find me as we wandered the aisles (as it usually does).
Once there it didn’t take long for me to realize that zip ties were the key to making this idea come to life. After being approached by the youngest Home Depot associate in the history of the company and getting signed up for some consultation about resurfacing our kitchen cabinets, we found all the tools and supplies we needed.

Zip ties, almost as valuable as duct tape.
The first step was to remove all the candle related bits from the shade that I wouldn’t need, so with some wire cutters I cut out the top piece and the candle holder from the bottom. I also cut off the chain used for hanging the shade.

Point of no return.
With the top cut out I made a template of the opening that I would use to cut a circular disc out of the 26 gauge sheet metal. With my new tin snips I made pretty easy work of that.

Like a hot knife through butter.
I then drilled a hole through the center of the disk and expanded it using the tin snips (this part was not so easy). It wasn’t the prettiest hole, but it would do the job. It just had to be big enough for the light fixture to fit through.

Good enough.
Next I drilled equally spaced holes around the perimeter of the disc and used the zip ties to secure it to the ring at the top of the shade.

Fits like a glove.
Now all I had to do was slide the bulb receptacle of the pendant fixture through the disc and fasten the washer on the other side, just like any other compatible shade you would pick up at the store. This picture is just a test fit before I attached the fixture to the ceiling.

Not too shabby.
The last step was to remove the ugly old light fixture and wire up the new pendant light fixture (don’t forget to turn off the circuit breaker kids). The fixture came with simple instructions so that was pretty straightforward. The hardest part was being able to see, but Nikki double fisted a couple flashlights so I had plenty of light. Once the fixture and the medallion were in place, it was just a matter of reattaching the shade and screwing in a light bulb.

Old and busted.
Overall the project only took a couple hours and cost about $65 in materials including the shade. A similar pendant light from the store would easily cost $100-200 and wouldn’t be nearly as unique. This was our first real addition inside the house and the first step is remodeling our laundry room.

New hotness.