Nikki by example - Just a girl trying to lead by example
  • Home
  • Style
  • Health
  • Motherhood
  • Travel
  • Extras
    • DIY
    • Food
    • Music
  • About Nikki
    • Our DIY Wedding
Home
Style
Health
Motherhood
Travel
Extras
    DIY
    Food
    Music
About Nikki
    Our DIY Wedding
Nikki by example - Just a girl trying to lead by example
  • Home
  • Style
  • Health
  • Motherhood
  • Travel
  • Extras
    • DIY
    • Food
    • Music
  • About Nikki
    • Our DIY Wedding
DIY•Life

DIY Storage Boxes

DIY Storage Boxes | NCsquared Life
January 24, 2014 by Nikki 1 Comment

DIY Storage Boxes | NCsquared Life

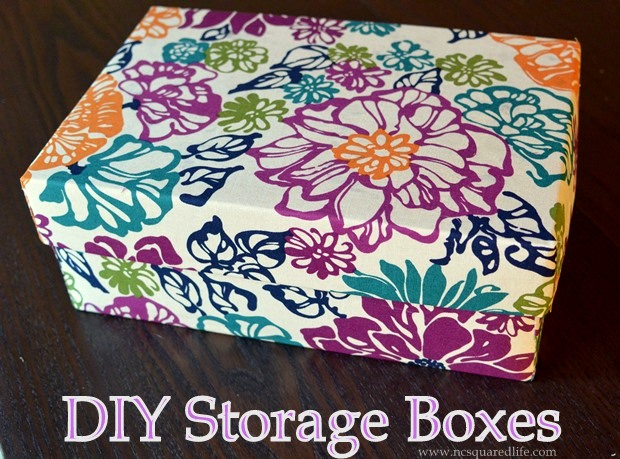
After reading an article from Women’s Health Magazines about how to bliss out your bedroom, I decided my newest household endeavor would be to turn my bedroom and master bathroom into a spa-like retreat. It’ll take some work, which requires time, but I’m starting with taking baby steps.

First thing’s first, I decided to make some DIY storage boxes from old shoe boxes to remove the clutter from our dressers. I have a really bad habit of throwing everything onto the dresser: clothes, papers, pens, jewelry, books, you name it. I’ve tried so many times to make a habit of tidying up on a regular basis but I decided it’s much easier to hide the mess. Hey, like I said, baby steps! These boxes are really easy to make and only require some fabric and spray glue.
DSC_0931

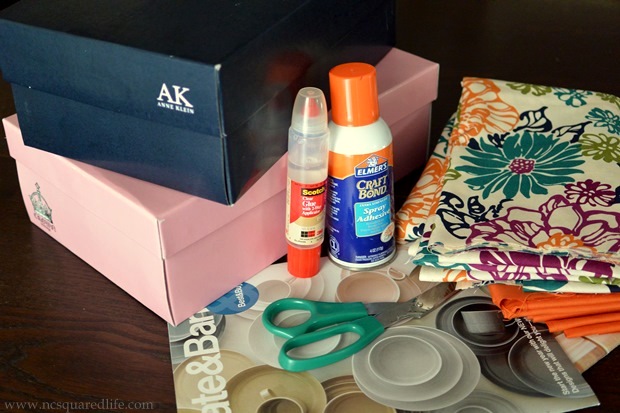
Supplies:
Shoe boxes (with lids)
Glue (I used Elmer’s Craft Bond spray adhesive)
Fabric (about 1 yard for each box)
Scissors
Newspaper or old magazines (to prevent glue from spraying on your surfaces)
Ruler (not pictured)
Pencil (not pictured)


Step 1: Iron the Fabric. This may seem tedious (it did to me because I’m impatient and wanted to jump right in) but you don’t want your finished product to be all wrinkled. It won’t look as nice. If your fabric is already nice and smooth, you can probably skip this step.

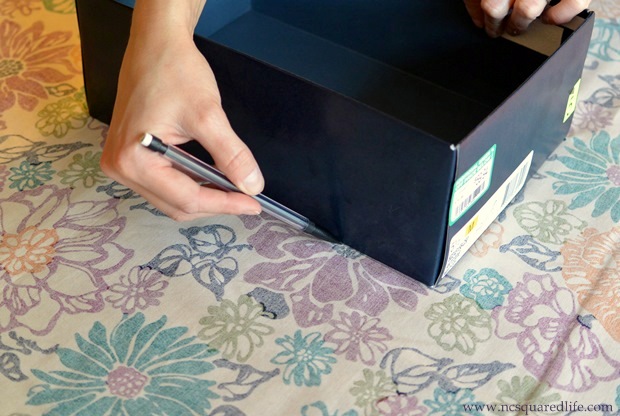
Step 2: Trace the Box on the Fabric.
DSC_0947

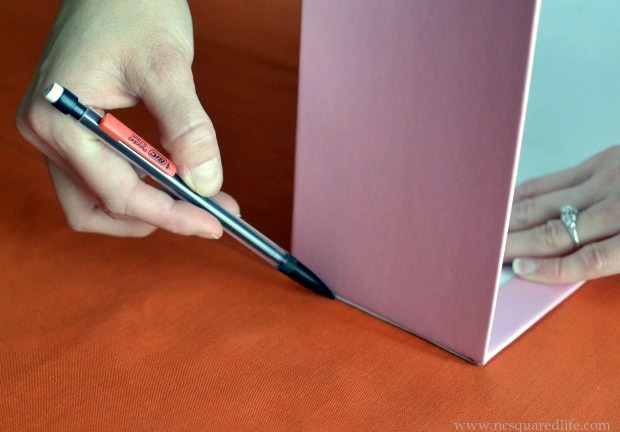
Sit the box on the fabric and trace around the bottom. THEN, without moving the bottom/base from its position, FLIP it onto its side and trace that side onto the fabric. Place the box back on its bottom in the original rectangle/square you traced and flip it on the other side and trace. Do this for all four sides.
DSC_0942

I didn’t get a good photo using the pretty patterned fabric so here it is in the orange!

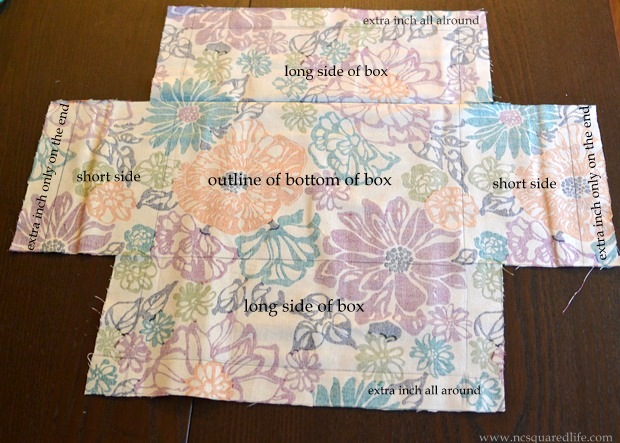
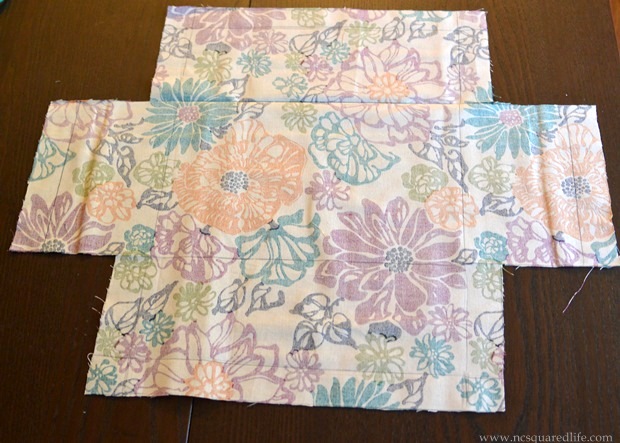
Now comes the tricky part.  I used a rectangular-shaped box so I extended the long sides by an inch on each side, meaning, once I traced out all the sides, I used the ruler and added an inch to tops and sides of the two longer sides. To the two shorter sides (on a shoebox, this is where the list the name and size of the shoe, if that helps), I added an extra inch only to the end, and not on the sides. If you’re using a square-shaped box, just do this to two of the opposite sides (as if they were the “longer” sides)

The reason is because of this: when you’re gluing your fabric to the box, you want each side of fabric to be long enough to cover the side of the box AND fold over to the inside of the box so that the entire box is covered and none is exposed. By adding an inch to the top and sides of each longer side of the fabric, you have enough fabric to wrap over the edge of the box, as well as about an inch to wrap along the sides, which will smooth out the seams when you fold up short sides in the end. You’ll see what I mean in Step 4.

So, after adding your extra inches described above, this is what your fabric should look like:
DSC_0949

Maybe this will help:

DSC_0949_text


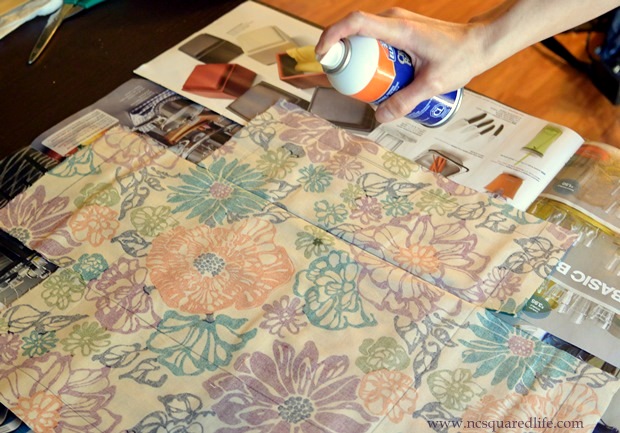
Step 3: Prep and Glue the Fabric. Lay down your newspaper/old magazine pages so that you cover all surfaces you don’t want to get sprayed with adhesive. Place the fabric on the newspaper and give it a generous spray with the glue. Make sure to cover every inch of fabric with a good amount of glue.
DSC_0952

Step 4. Press the Glued Fabric onto Each Side. Now, work quickly but carefully. Start with the long sides and press the fabric smoothly onto the side like so:
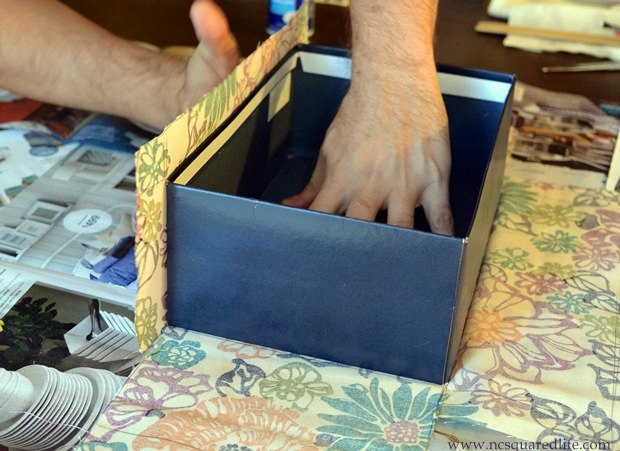
DSC_0954

Then fold the sides over like so (this is why you want the extra inch of fabric on each side, without it, you wouldn’t be able to fold the sides over and then it will be harder to smooth out the edges and some of the box might even be left exposed):
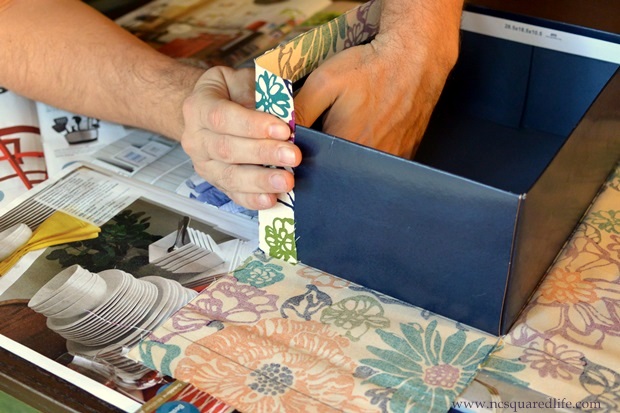
DSC_0956

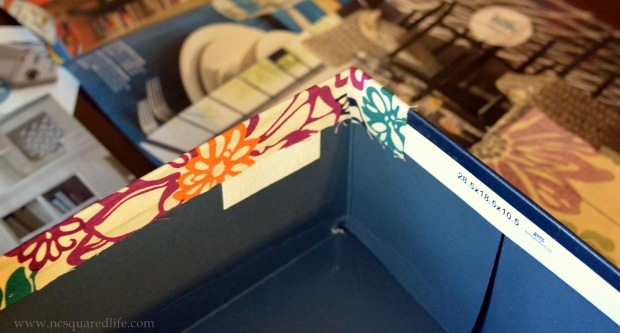
Then fold the tops over the edge of the box, like so:
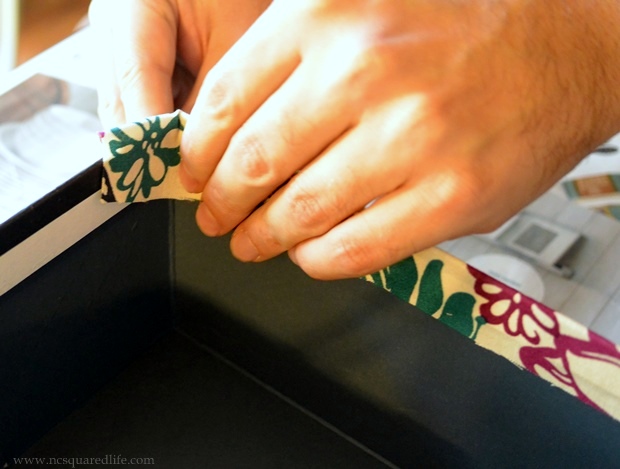
DSC_0958

DSC_0957

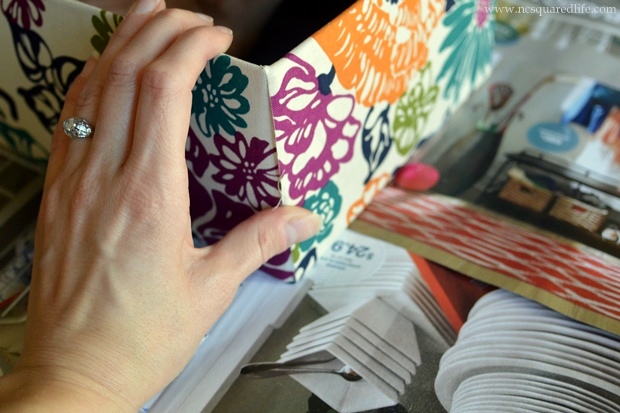
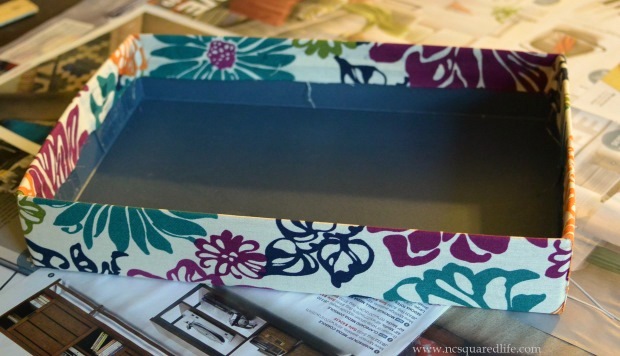
Repeat on the opposite side. Then, fold the shorter sides up and smooth out the seams, like so:
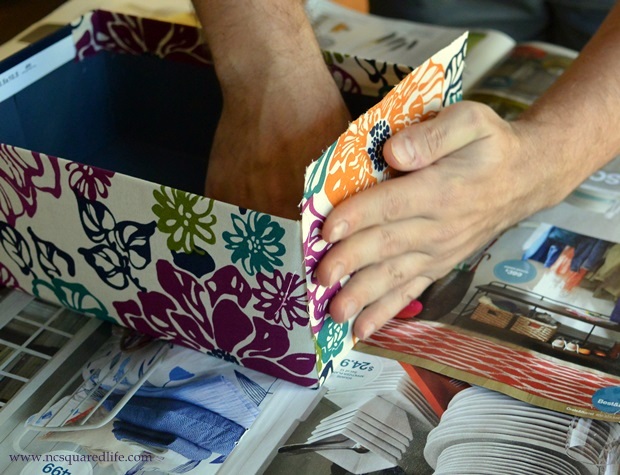
DSC_0963

DSC_0964

Make sure as you go, you smooth out each side as best as you can.
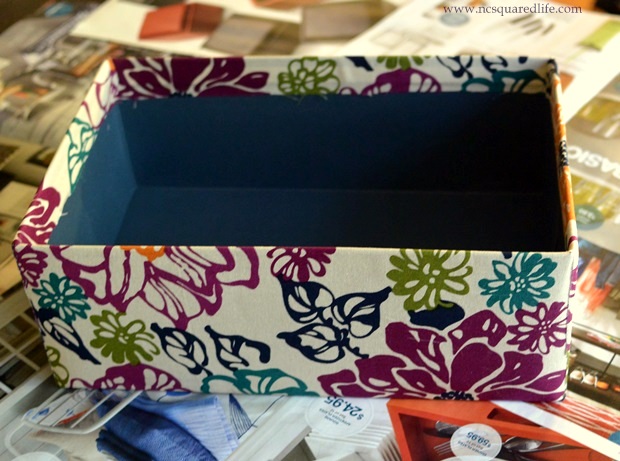
DSC_0965


Step 5: Repeat all of the procedures for the lid:
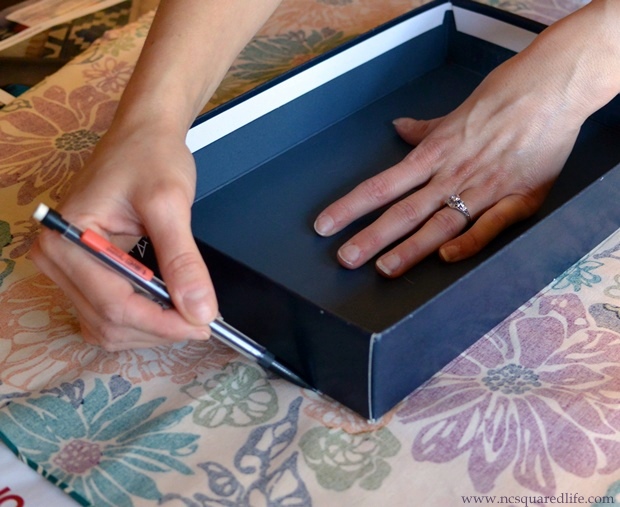
DSC_0966

DSC_0967


Step 6: Let Dry. Let the box for an hour or so and it’ll be ready to use!
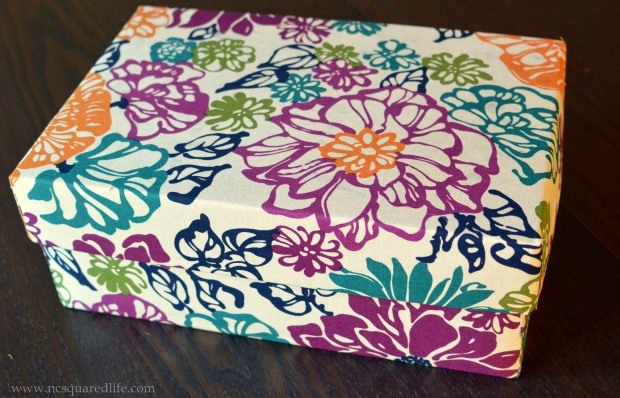
DSC_0970

Share:
Reading time: 3 min
DIY•Fashion

Late Halloween Post

November 7, 2013 by Nikki 1 Comment

This year I’ve been busy with grad school and Nick is busy at work so Halloween was very last minute.  This is why I’m just now getting around to posting about it (and putting away decorations) on November 7th. We might be a little more on top of our game next year, but I won’t make any promises.

Our costumes were inspired by the movie Pitch Perfect. I love that movie! If you haven’t seen it, stop reading this and go watch it right now. I’ll wait. Or you can just watch this clip:

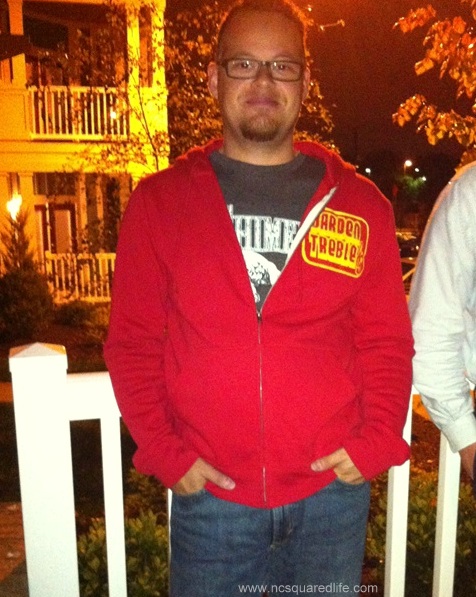
Luckily, Nick likes it a lot, too (we don’t always have the same tastes in movies) so I was able to convince him to dress up as a Barden University Treblemaker and I went as a Barden Bella. And it was aca-awesome!

a capella

How To Get The Look

The Barden Bella uniform is pretty standard: white, sleeveless button front; navy cap-sleeved blazer, navy pencil skirt, yellow paisley scarf and black heels. Oh, and don’t forget the microphone!

bella

Button-Front: JC Penny | Blazer: Saks Fifth Ave (on major sale) | Skirt: Target | Shoes: Target (really old) | Scarf: Michael’s

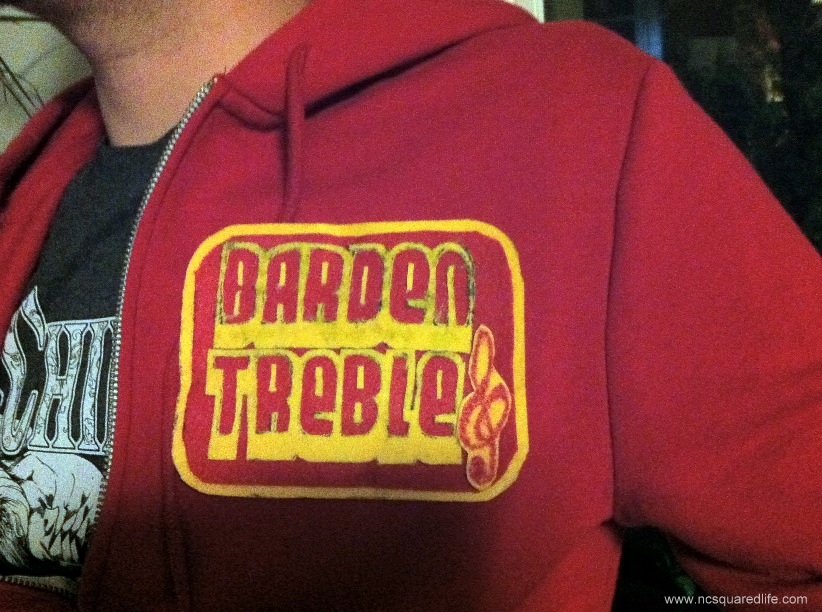
The Treblemaker uniform was even easier in that all Nick had to do was find a maroon/red jacket, gray tshirt, jeans, and a patch.

treble

He had to make the patch out of red and yellow felt that he purchased at Michael’s. Using a photo he found online, he cut the Treblemaker symbol out of the felt and then pinned it to the jacket. I think it turned out really well!

treblemaker

 The best part is that I can rock the blazer and skirt in job interviews after school!

BONUS: Since I wasn’t really blogging last year, I’ll leave you with a blurry photo of our costumes last Halloween; we were R2D2 and C3P0 from Star Wars:

photo (42)

We spray painted an old suit gold and wrapped a cumber bun in red and white plastic to achieve the C3P0 look and Nick painted R2D2’s details onto a white cotton dress for me.

Share:
Reading time: 1 min
DIY•Life

Last-Minute Housewarming Gift

October 21, 2013 by Nikki No Comments

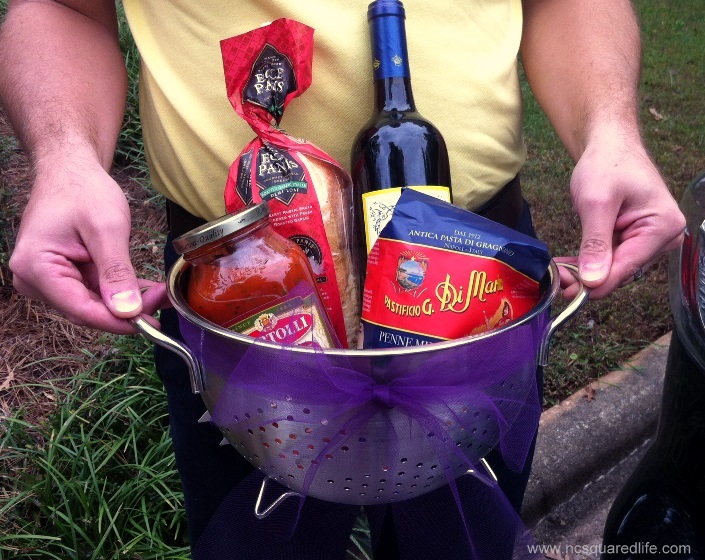
We were invited to a housewarming party and needed a last-minute gift that didn’t cost a ton of money. Luckily, Pinterest always comes through and inspired this gift idea, a spaghetti dinner in an oh-so-useful colander. We purchased the colander and filled it with noodles, spaghetti sauce, a small baguette of bread and yummy red wine. Nick is an expert at bow-tying, as you can see, which was the perfect finishing touch.

gift

Pinterest inspiration here.

And no housewarming gift is complete without flowers. Look at this lovely bouquet!

flowers

What is your go-to gift when you don’t have much time to plan?

Share:
Reading time: 1 min
DIY•Hobby•House•Life

Welcome to the Neighborhood

July 8, 2013 by Nikki No Comments

After sitting empty for several months, the house next door has residents! I actually met them briefly about a month ago when they were looking at the house and they seem really nice. I was about to walk the dogs when they asked me what I thought of the neighborhood and I told them it was great. They said they have two dogs, too! I’m looking forward to getting to know them. And I’m hoping it’s the start of a beautiful friendship.

A while back, after we first moved in, I wrote about welcome casseroles. Remember how women used to make casseroles to welcome new residents to the community and to ease their move-in stress? I questioned whether folks still do that these days because no one did it for us. However, our neighbor at the time, Casey, the previous resident of the newly occupied house, came over to introduce himself and give us his number in case we needed anything. We actually became pretty close neighbors. He even mowed our lawn for us while we were on our honeymoon!

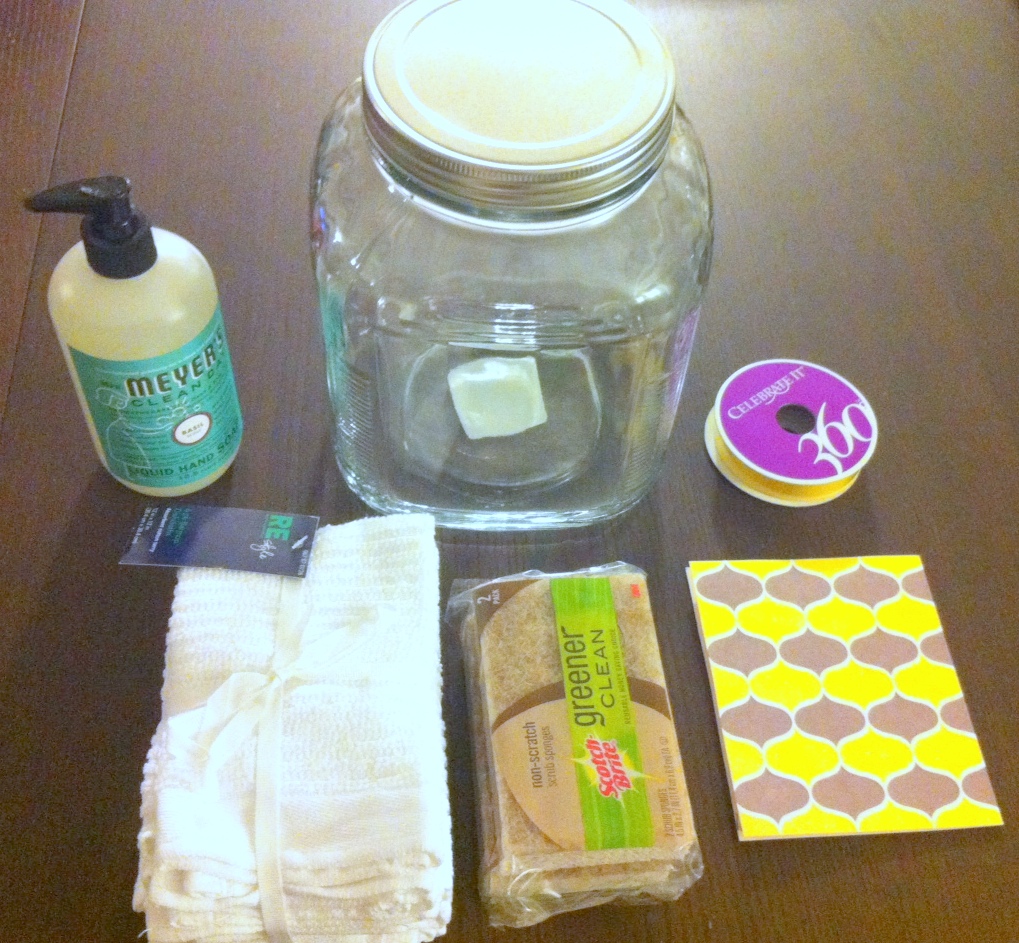
I wanted to do something nice for our new neighbors to welcome to the neighborhood. They’re still settling in so, taking a note from Casey, we mowed their lawn for them this afternoon. Moving can be stressful. And we should know because we’ve moved a million times over the last ten years. My welcome casserole to our new neighbors (I don’t even know their names yet, but it’s a young couple, just like us) is this cute little  housewarming gift in a jar:

gift

Inspired by Pinterest here.

The jar contains a bottle of Meyer’s hand soap, two sponges, and some dish cloths. We also included a little card with a well wishes, and Nick tied the beautiful bow. I thought about dropping off some baked goods or an easily prepared dinner (like spaghetti), but with all the food allergies out there these days, I was afraid it wouldn’t go over very well. But everyone cleans, right? Especially when moving into a new home.

gift 3

I hope they like it! After they get settled, we’ll invite them over for dinner but for now, we’ll stay out of the way.


Share:
Reading time: 1 min
DIY•House

Let there be light: DIY light fixture project

February 10, 2013 by Nick No Comments

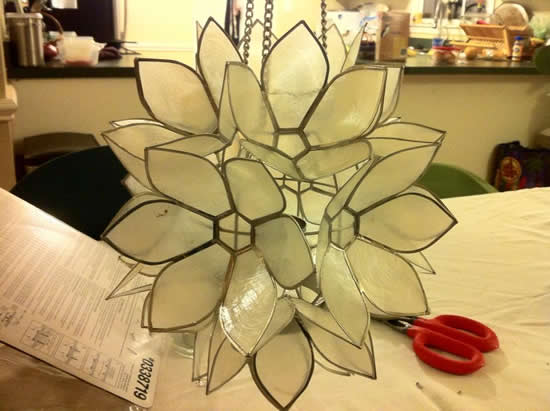
While shopping at Home Goods for some side tables, we came across what we thought was a cute little floral glass light shade.  Unfortunately it was just a candle holder, but I figured with a little ingenuity I’d be able to modernize it and make an electric fixture out of it.  We decided we would use it in the laundry room since it was a small room and only a single light bulb would fit into the shade.

Light shade before I started cutting it apart.

Continue reading
Share:
Reading time: 3 min
Page 2 of 2«12

About Me

Hi, I’m Nikki. This is where I blog about my life and personal style. I’m a wife and mom, public health professional, sushi lover, wine enthusiast, and coffee snob. Welcome to my little corner of the world where I try to lead by example!

Follow Me

Recent Posts

Instagram Outfit Roundup

Instagram Outfit Roundup

September 21, 2021

Yellow Skirt Two Ways

July 26, 2021
Life Lately: Summer Updates

Life Lately: Summer Updates

July 23, 2021

Popular Posts

I Love Being a Mom… Who Knew?

I Love Being a Mom… Who Knew?

August 2, 2017
The End of Summer

The End of Summer

September 5, 2017
A Short Girl Wears a Midi Skirt

A Short Girl Wears a Midi Skirt

September 8, 2014

Facebook Page

https://www.facebook.com/nikkibyexample
Load More...Follow on Instagram

© 2018 copyright Nicole Crews // All rights reserved